Makeup sponges can look clean while holding foundation, oil, dead skin, and moisture deep inside their pores. That hidden buildup may cause uneven application, unpleasant smells, and avoidable skin irritation. Learning how to clean buildup off makeup sponges properly requires more than a quick rinse under warm water. It requires gentle pressure, suitable cleanser, complete rinsing, and careful drying.
Cosmetic scientist and beauty educator Michelle Wong, PhD, explains, “Water alone does not remove every product from a makeup tool.” Her point matters because silicone-heavy foundations and cream concealers can cling stubbornly to sponge fibers. A practical routine begins by soaking the sponge with lukewarm water. Apply a mild, fragrance-free soap or a cleanser made for makeup tools. Work it through the sponge with your fingertips, not your nails. Press and release the sponge repeatedly until the water becomes clear.
Do not twist it aggressively.
That mistake can damage the material and leave small tears where residue collects. Rinse again, then press the sponge inside a clean towel. Let it air-dry completely in a ventilated place, away from closed drawers and damp bathroom surfaces. I would not pretend every sponge can be rescued. Old, cracked, stained, or persistently smelly sponges should be replaced. Cleaning helps, but it cannot reverse material breakdown. A thoughtful guide should also admit that personal skin sensitivity changes the safest routine. Patch testing a new cleanser and cleaning the sponge after frequent use may prevent problems before they become visible.
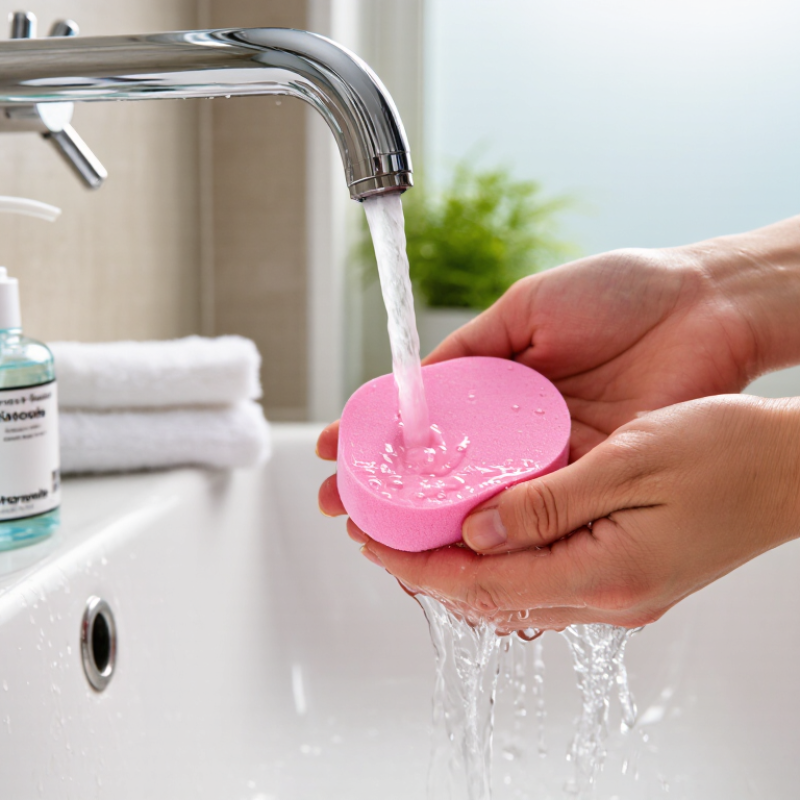
Makeup sponges collect more than visible foundation. Their porous foam absorbs liquid products, skin oil, sweat, and tiny flakes of dead skin. Each time the sponge touches your face or a countertop, it can pick up more residue. Damp foam also takes longer to dry inside than it appears to from the surface.
That trapped moisture matters. Warm, humid storage can encourage microorganisms to grow, especially when a sponge stays wet in a closed makeup bag. Bacteria and other microbes may transfer back to the skin with repeated use. A musty smell, discoloration, or a sticky film can signal that washing is overdue, though a sponge can hold residue even when it looks clean. Looks can mislead.
Rinsing only the outside may leave product in the center, where squeezed foam releases cloudy water. Wash the sponge with lukewarm water and a mild cleanser, pressing gently rather than twisting or pulling. Rinse until the water runs clear, then squeeze out moisture with a clean towel and let the sponge air-dry fully in an open, ventilated spot. I still find it easy to rush the drying step; a damp sponge tucked away too soon can undo careful washing. Replace it if it develops cracks, persistent odor, or residue that will not rinse out.
What You Need to Clean a Makeup Sponge Safely
Gather lukewarm water, a mild fragrance-free cleanser, and a clean towel. A shallow bowl helps if you want to soak the sponge. Keep the sink and your hands clean, too. Avoid boiling water, harsh solvents, and strong detergents; they can damage the sponge or leave irritating residue. You do not need special equipment. A little patience matters more.
Research published in the Journal of Applied Microbiology in 2019 examined contamination in used makeup products, including sponges. The researchers reported that 93% of surveyed beauty blenders had never been cleaned, and 64% had been dropped and used again without washing. These figures describe that study’s sample, not every sponge user. Still, they make regular cleaning worth considering. Wet the sponge, work in a small amount of cleanser, and gently squeeze it until the water runs clear. Don’t twist or scrub hard. Rinse thoroughly, press out water with the towel, then leave the sponge in an airy spot until fully dry. I used to put mine in a closed makeup bag too soon. That was not a great idea. A sponge that stays damp may be harder to keep fresh. Replace it if it tears, develops persistent odor, or remains stained after washing.
| Step or item | What to use or do | Why it helps | Safety note |
|---|---|---|---|
| 1. Gather supplies | Clean hands, lukewarm running water, a clean bowl if needed, and a small amount of mild liquid cleanser. | A simple setup makes it easier to wash away makeup and residue thoroughly. | Choose a gentle cleanser intended for skin or delicate items; avoid strong household cleaners. |
| 2. Wet the sponge | Hold the sponge under lukewarm water and gently squeeze it until it is fully damp. | Dampening helps loosen product buildup and lets cleanser spread through the sponge. | Avoid very hot water, which can damage some sponge materials. |
| 3. Apply cleanser | Use a small amount of mild, fragrance-free liquid cleanser. Work it into the sponge with gentle presses and squeezes. | Gentle pressure helps release makeup without pulling or tearing the material. | Do not scrub with nails or use abrasive tools. |
| 4. Rinse thoroughly | Rinse under lukewarm running water, repeatedly squeezing gently until the water runs clear and no cleanser remains. | Rinsing removes loosened makeup, oil, and soap residue. | Avoid twisting or wringing the sponge, which may weaken or deform it. |
| 5. Remove excess water | Press the sponge gently between clean hands or a clean towel. | Removing excess water helps the sponge dry more efficiently. | Do not store it while damp in a closed container. |
| 6. Air-dry completely | Place it in a clean, well-ventilated spot and let it dry fully before storing. | Good airflow helps prevent the sponge from staying damp for long periods. | Keep it off dirty surfaces and away from enclosed, humid storage while drying. |
| Cleaning frequency | Clean regularly; washing after each use is a useful routine, especially when the sponge is used with liquid or cream products. | Frequent washing limits the amount of makeup and skin oil left in the sponge. | Wash sooner if it looks visibly soiled or has an unusual odor. |
| When to replace | Replace the sponge if it develops persistent odor, visible mold, deep damage, or does not clean up adequately. | A damaged or persistently dirty sponge may be difficult to clean effectively. | Do not use a sponge with visible mold or one that irritates your skin. |
Wet the sponge with lukewarm water until it expands. Avoid hot water, which may damage delicate foam. Add a small amount of gentle, fragrance-free soap to the stained areas. Press and release the sponge between your fingers, working from the center toward the surface. Don’t twist or scrub it against a rough surface; that can tear the material. You may see foundation cloud the water. Keep going.
Rinse under running water while gently squeezing until the water runs clear and no slick soap remains. Stubborn residue may need another wash, not harder pressure. I sometimes miss product near the pointed tip, so check creases and narrow edges before rinsing again. Squeeze out excess water with a clean towel, then leave the sponge in an airy spot to dry completely. Avoid storing it damp in a closed bag or drawer, where lingering moisture can encourage unwanted growth. If it stays discolored, smells unusual, or begins breaking apart, cleaning may not restore it; replacing it is the safer choice.
After washing a makeup sponge, rinse it under lukewarm running water until the water runs clear and no slippery cleanser remains. Gently squeeze it between your palms to push out the water. Don’t twist or pull; that can stretch the foam and create weak spots. Check the center, too. A sponge may look clean outside while holding suds within.
Press the sponge into a clean towel to absorb extra moisture, then leave it in a well-ventilated place to air-dry fully. Set it on a dry rack or clean surface, away from a closed drawer, damp bathroom corner, or direct heat. Turn it once if the underside stays wet. It can take several hours, sometimes longer. Be patient.
Store the sponge only when it feels dry all the way through. A breathable case can help keep dust off, but a sealed container may trap moisture. I’ve found that rushing this step is easy when mornings are busy; still, a faint damp feel is worth taking seriously. Clean the storage spot regularly, and replace a sponge that develops a persistent odor, discoloration, or damaged texture.
A makeup sponge can be cleaned, but cleaning cannot repair a worn or persistently dirty one. Replace it when it stays stained after washing, feels tacky or crumbly, or has tears that trap residue. A sour smell is another warning. So is a spot that returns after the sponge dries. Don’t keep using it just because it still looks usable.
There is a hygiene reason to be cautious. A 2019 study in the Journal of Applied Microbiology examined 467 used cosmetics, including makeup sponges. Researchers found that 79–90% of products carried bacteria; beauty sponges had the highest contamination levels. The study also reported that 93% of sponge users had never cleaned theirs. These findings show contamination can occur, but they do not tell us an exact safe replacement interval. Use judgment. If you share a sponge, cannot clean it thoroughly, or have used it while dealing with an eye or skin infection, replace it rather than risk carrying residue forward. Let a washed sponge dry fully in open air; a damp sponge left in a closed pouch can develop an unpleasant smell. Don’t wait for perfect certainty.
Its porous foam absorbs foundation, skin oil, sweat, and tiny flakes. Residue can settle deep inside.
Yes. The outside may look clean while the center holds product or cleanser. Looks can mislead.
Rinse it with lukewarm water and mild cleanser. Press gently, then rinse until the water runs clear.
Twisting can stretch the foam and create weak spots. Squeeze it gently instead.
Press it into a clean towel, then leave it in an open, ventilated spot. Turn it if the underside stays wet.
Use a clean, breathable place. A sealed case or damp bathroom corner can trap moisture.
Replace it if it has tears, a persistent odor, a tacky feel, or residue that will not rinse out. Don’t wait for perfect certainty.
Not always. Cleaning cannot repair crumbly foam or damage that traps residue.
The article gives no exact replacement interval. Check its condition and replace it when cleaning no longer works.
Busy mornings can make a faint damp feel seem unimportant. Still, moisture inside a closed pouch can lead to an unpleasant smell.
Makeup sponges can collect foundation, concealer, skin oils, and dead skin with every use. When residue stays trapped in the sponge, it can become a breeding ground for bacteria and may contribute to skin irritation or breakouts. Regular cleaning helps keep the sponge fresh and working well. To clean buildup off makeup sponges properly, use lukewarm water and a gentle, fragrance-free cleanser, then wet the sponge thoroughly.
Massage the cleanser into the sponge with your fingers, focusing on stained areas, and rinse repeatedly until the water runs clear. Avoid twisting or pulling, which can damage the material. Gently press out excess water with a clean towel, then let the sponge air-dry completely in a well-ventilated place before storing it. Replace the sponge if it remains discolored or odorous after cleaning, develops tears, or no longer rinses clean.
